Windows Server 2012 GUI

http://blogs.technet.com/b/askds/archive/2012/09/20/windows-server-2012-shell-game.aspx


Adding Server Graphical Shell and Graphical Management Tools and Infrastructure

Install-WindowsFeature server-gui-mgmt-infra,server-gui-shell -source:wim:d:\sources\install.wim:2


Use 2 for standard and 4 for a datacenter edition and make sure D is the drive with the DVD with Windows Server 2012.

Windows 2012 – CLI

Activating Windows 2012 with powershell:

(or use sconfig)

slmgr.vbs –ipk <productkey>
slmgr.vbs –ato


Rename the sever:
  • Determine the current name of the server with the hostname or ipconfig command.
  • In Windows PowerShell, run Rename-Computer.
  • Restart the computer.


Installing GUI with powershell:

(or use sconfig)

Install-WindowsFeature Server-Gui-Shell, Server-Gui-Mgmt-Infra

An other option is to use dism

Dism /online /enable-feature /featurename:ServerCore-FullServer /featurename:Server-Gui-Shell /featurename:Server-Gui-Mgmt

If this fail, you need to mount the files.

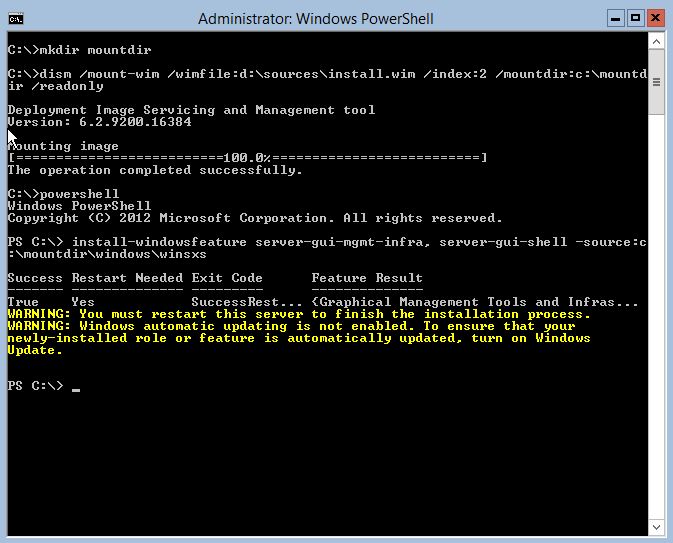
1. Create a folder to mount WIM (mkdir c:\mountdir)

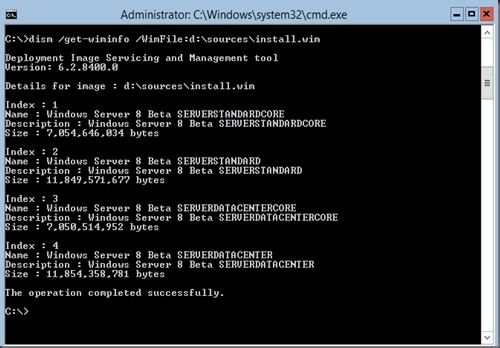
2. Check the index number needed for a server with GUI image (where d is the DVD drive)

dism /get-wiminfo /Wimfile: d:\sources\install.wim

We want to install the SERVERSTANDARD so the index number will be 2

3. Mount the WIM for Server Standard:

dism /mount-wim /wimfile: d:\sources\install.wim /Index:2 /mountdir:c:\mountdir /readonly

4. Start powershell and execute:

Install-WindowsFeature Server-Gui-Mgmt-Infra, Server-Gui-Shell –restart –source c:\mountdir\windows\winsxs

5. Restart the server


Remove the GUI with powershell:
Uninstall-WindowsFeature Server-Gui-Shell, Server-Gui-Mgmt-Infra


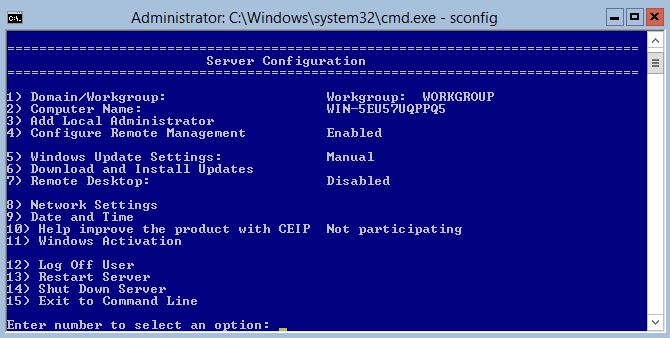
SCONFIG

Use SCONFIG to configure a lot of options (domain/Computername/updates/nic/…)


For other options to remove/install the GUI look at http://www.howtogeek.com/111967/how-to-turn-the-gui-off-and-on-in-windows-server-2012/

Configure a Server Core Server: http://technet.microsoft.com/en-us/library/jj592692.aspx#BKMK_1_5

Script – Get HP Serial Numbers

To get a list of HP Serial numers run the following Powershell script. Place the servernames/ipaddresses you want to check in the serverlist parameter.


#
# Get HP Serial Numbers from server text file
#
# Written by Bastiaan van Leeuwen
#
# Change $serverlist parameter to the right text file

$serverlist = "d:\script\servers.txt"
$username = Get-Credential domain\user

foreach($server in get-content $serverlist)
{
gwmi win32_systemenclosure -computer "$server" -credential $username –ErrorAction SilentlyContinue | 
select __SERVER,serialnumber
}


SCRIPT – Computer Inventory

The Computer Inventory Script enumerates Hardware, OS, System, Processor, Memory, Disk, and Network information and neatly organizes it in an Excel file. I’ve provided Version 2 of the script that allows you to choose a number of computer resources; all computers in the domain, all servers in the domain, computers from a list maintained in a text file, and the ability manually pick a computer. Version 2 of the PowerShell script also allows you to send credential information should you wish to logon the remote computer with an alternative user account. This is helpful for DMZ servers as well as stand alone servers that are not members of your domain.

source: http://www.powershellpro.com/why-i-no-longer-hate-writing-documentation/614/


[wpdm_file id=78]

Active Directory Users and Computers Saved Queries

source: http://myitforum.com/cs2/blogs/rcrumbaker/archive/2008/08/07/active-directory-users-and-computers-saved-queries.aspx

Right Click on Saved Queries and Choose New and then Query.

Name the Query accordingly and then click on Define Query…


Then Find the Custom Search and click on the Advanced tab.

Paste each of these in the <add criteria from above to this list> area and then click OK.


Locked Out Users

(&(&(&(&(objectCategory=person)(objectClass=user)(lockoutTime:1.2.840.113556.1.4.804:=4294967295)))))


Dial In Access

(&(&(&(&(objectCategory=person)(objectClass=user)(msNPAllowDialin=TRUE)))))


Disabled User Accounts

(&(objectCategory=person)(objectClass=user)(userAccountControl:1.2.840.113556.1.4.803:=2))


No Expiring Accounts

(&(objectCategory=person)(objectClass=user)(userAccountControl:1.2.840.113556.1.4.803:=65536))


Active Accounts

(&(&(objectCategory=person)(objectClass=user)(!userAccountControl:1.2.840.113556.1.4.803:=2)))


Hidden Mailboxes

(&(objectCategory=person)(objectClass=user)(msExchHideFromAddressLists=TRUE))


Windows 2000 SP4

(&(&(&(objectCategory=Computer)(operatingSystem=Windows 2000 Professional)(operatingSystemServicePack=Service Pack 4))))


Windows XP SP3

(&(&(&(&(&(&(&(objectCategory=Computer)(operatingSystem=Windows XP Professional)(operatingSystemServicePack=Service Pack 3))))))))


Vista SP1 Machines

(&(&(&(&(sAMAccountType=805306369)(objectCategory=computer)(operatingSystem=Windows Vista*)(operatingSystemServicePack=Service Pack 1)))))


All Workstations

(sAMAccountType=805306369)


2003 Servers Non-DCs

(&(&(&(samAccountType=805306369)(!(primaryGroupId=516)))(objectCategory=computer)(operatingSystem=Windows Server 2003*)))


2003 Servers – DCs

(&(&(&(samAccountType=805306369)(primaryGroupID=516)(objectCategory=computer)(operatingSystem=Windows Server 2003*))))


Server 2008

(&(&(&(&(samAccountType=805306369)(!(primaryGroupId=516)))(objectCategory=computer)(operatingSystem=Windows Server 2008*))))
Backup en restore windows FSRM Quotas

To get a list of quota’s in a text file: dirquota q l > all_quotas.txt

To backup the complete quota database first stop the FSRM services, copy the SRM directory and restart the FSRM services. To be able to copy the SRM directory you need rights on the System Volume Information directory.


1. Stop the FSRM services

net stop srmSvc
net stop srmReports
net stop quota
net stop Datascrn

2. Copy SRM for the disk you want to a backup folder, or restore them from a backup folder

3. Start the FSRM services

net start Datascrn
net start quota
net start srmReports
net start srmSvc


Profile Changes in Windows Vista and Windows Server 2008 and beyond

Windows Vista and Windows Server 2008 introduce a number of new user profile paths and environment variables that differ from earlier versions of Windows and these changes may have an impact on scripts such as logon scripts and application install scripts. Most scripts should work correctly – VBScript scripts that use system functions to find folder paths should work as expected, however batch scripts that use environment variables or hard codes scripts will require modifications. Here’s a short run down of the changes.

The following table lists the old profile path and the corresponding new path under Windows Vista/Windows Server 2008:


OLD PATH NEW PATH
Documents and Settings Users
Documents and Settings\Default User Users\Default
Documents and Settings\All Users\Application Data ProgramData
Documents and Settings\All Users\Start Menu ProgramData\Microsoft\Windows\Start Menu
Documents and Settings\All Users\Templates ProgramData\Microsoft\Windows\Templates
Documents and Settings\{username}\Local Settings\Application Data Users\{username}\AppData\Local
N/A Users\{username}\AppData\LocalLow
Documents and Settings\{username}\Application Data Users\{username}\AppData\Roaming
Documents and Settings\{username}\Cookies Users\{username}\AppData\Roaming\Microsoft\Windows\Cookies
Documents and Settings\{username}\NetHood Users\{username}\AppData\Roaming\Microsoft\Windows\Network Shortcuts
Documents and Settings\{username}\PrintHood Users\{username}\AppData\Roaming\Microsoft\Windows\Printer Shortcuts
Documents and Settings\{username}\Recent Users\{username}\AppData\Roaming\Microsoft\Windows\Recent
Documents and Settings\{username}\SendTo Users\{username}\AppData\Roaming\Microsoft\Windows\SendTo
Documents and Settings\{username}\Start Menu Users\{username}\AppData\Roaming\Microsoft\Windows\Start Menu
Documents and Settings\{username}\Templates Users\{username}\AppData\Roaming\Microsoft\Windows\Templates
N/A Users\{username}\Contacts
Documents and Settings\{username}\Desktop Users\{username}\Desktop
Documents and Settings\{username}\My Documents Users\{username}\Documents
N/A Users\{username}\Downloads
Documents and Settings\{username}\Favorites Users\{username}\Favorites
N/A Users\{username}\Links
Documents and Settings\{username}\My Documents\My Music Users\{username}\Music
Documents and Settings\{username}\My Documents\My Pictures Users\{username}\Pictures
N/A Users\{username}\Saved Games
N/A Users\{username}\Searches
Documents and Settings\{username}\My Documents\My Videos Users\{username}\Videos
Documents and Settings\All Users Users\Public
Documents and Settings\All Users\Desktop Users\Public\Desktop
Documents and Settings\All Users\Documents Users\Public\Documents
Documents and Settings\All Users\Favorites Users\Public\Favorites
Documents and Settings\All Users\Documents\My Music Users\Public\Music
Documents and Settings\All Users\Documents\My Pictures Users\Public\Pictures
Documents and Settings\All Users\Documents\My Videos Users\Public\Videos

Folders to take note of here are the folders in the All Users path. Many older applications that use out of date methods to resolve system folders, will resolve paths under \ProgramData when looking for common locations. For example the common desktop may be resolved as \ProgramData\Desktop, however this is actually a junction point for \Users\Public\Desktop. A DIR /A:H listing in \ProgramData folder reveals the following junction points:

PATH POINTS TO
ProgramData\Application Data ProgramData
ProgramData\Desktop Users\Public\Desktop
ProgramData\Documents Users\Public\Documents
ProgramData\Favorites Users\Public\Favorites
ProgramData\Start Menu ProgramData\Microsoft\Windows\Start Menu
ProgramData\Templates ProgramData\Microsoft\Windows\Templates

These junction points should offer backward compatibility for older applications, however I have found that some of my installation scripts are not cleaning up shortcuts from the public desktop as expected.

There are also differences in environment variables between the new version of Windows and the older versions. Windows Server 2003 and below define the following variables relating to profiles:

ALLUSERSPROFILE=C:\Documents and Settings\All Users
APPDATA=C:\Documents and Settings\aaron\Application Data
HOMEPATH=\Documents and Settings\aaron
TEMP=C:\DOCUME~1\aaron\LOCALS~1\Temp
TMP=C:\DOCUME~1\aaron\LOCALS~1\Temp
USERPROFILE=C:\Documents and Settings\aaron

Windows Vista and Windows Server 2008 define the same variables while adding a couple more.

ALLUSERSPROFILE=C:\ProgramData
APPDATA=C:\Users\aaronp\AppData\Roaming
HOMEPATH=\Users\aaronp
LOCALAPPDATA=C:\Users\aaronp\AppData\Local
ProgramData=C:\ProgramData
PUBLIC=C:\Users\Public
TEMP=C:\Users\aaronp\AppData\Local\Temp
TMP=C:\Users\aaronp\AppData\Local\Temp
USERPROFILE=C:\Users\aaronp

In practice, I’ve found that scripts that reference locations such as %ALLUSERSPROFILE%\Desktop, are not performing actions as intended and will have to be updated to use %PUBLIC% instead. Certainly something that requires more investigation.

UPDATE: Microsoft have an excellent reference document that details the profile changes in Windows Vista and how roaming profiles should managed in a Windows Vista environment. Check it out for more information that what I’ve listed here:

Managing Roaming User Data Deployment Guide

source: http://blog.stealthpuppy.com/windows/profile-changes-in-windows-vistalonghorn-server/

Windows Server 2012 – Configure DHCP for Failover

DHCP failover overview

In Windows Server® 2008 R2, there are two high availability options available for DHCP Server deployment. Each of these options is associated with some challenges.

  1. DHCP in a Windows failover cluster. This option places the DHCP server in a cluster with an additional server configured with the DHCP service that assumes the load if the primary DHCP server fails. The clustering deployment option uses a single shared storage. This makes the storage a single point of failure, and requires additional investment in redundancy for storage. In addition, clustering involves relatively complex setup and maintenance.
  2. Split scope DHCP. Split scope DHCP uses two independent DHCP servers that share responsibility for a scope. Typically 70% of the addresses in the scope are assigned to the primary server and the remaining 30% are assigned to the backup server. If clients cannot reach the primary server then they can get an IP configuration from the secondary server. Split scope deployment does not provide IP address continuity and is unusable in scenarios where the scope is already running at high utilization of address space, which is very common with Internet Protocol version 4 (IPv4).

DHCP failover in Windows Server 2012 enables administrators to deploy a highly resilient DHCP service to support a large enterprise without the challenges of the options discussed earlier. The main goals of the feature are the following:

  • Provide DHCP service availability at all times on the enterprise network.
  • If a DHCP server is no longer reachable, the DHCP client is able to extend the lease on its current IP address by contacting another DHCP server on the enterprise network.

The DHCP server failover feature provides the ability to have two DHCP servers provide IP addresses and option configuration to the same subnet or scope, providing for continuous availability of DHCP service to clients. The two DHCP servers replicate lease information between them, allowing one server to assume responsibility for servicing of clients for the entire subnet when the other server is unavailable. It is also possible to configure failover in a load-balancing configuration with client requests distributed between the two servers in a failover relationship.

DHCP failover in Windows Server 2012 provides support for a maximum of two DHCP servers, and the failover relationship is limited to IPv4 scopes and subnets. Network nodes using Internet Protocol version 6 (IPv6) typically determine their own IPv6 address using stateless IP auto configuration. In this mode, the DHCP server delivers only the DHCP option configuration, and the server does not maintain any lease state information. A high availability deployment for stateless DHCPv6 is possible by simply setting up two servers with identical option configuration. Even in a stateful DHCPv6 deployment, the scopes do not run under high address utilization, which makes split scope a viable solution for high availability.

DHCP failover architecture

Administrators can deploy DHCP servers running Windows Server 2012 as failover partners in either hot standby mode or load sharing mode.

Hot standby mode

In hot standby mode, two servers operate in a failover relationship where an active server is responsible for leasing IP addresses and configuration information to all clients in a scope or subnet. The secondary server assumes this responsibility if the primary server becomes unavailable. A server is primary or secondary in the context of a subnet. For instance, a server that has the role of a primary for a given subnet could be a secondary server for another subnet.

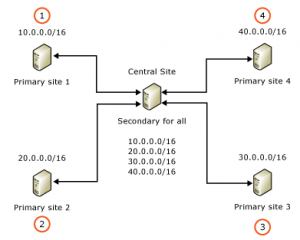
Hot standby mode of operation is best suited to deployments where a central office or data center server acts as a standby backup server to a server at a remote site, which is local to the DHCP clients (ex: hub and spoke deployment). In such deployments, it is undesirable to have a remote standby server service any clients unless the local DHCP server becomes unavailable. The figure below is an example of a hub and spoke deployment.

Load sharing mode

In a load sharing mode deployment, which is the default mode of operation, the two servers simultaneously serve IP addresses and options to clients on a given subnet. The client requests are load balanced and shared between the two servers.

The load sharing mode of operation is best suited to deployments where both servers in a failover relationship are located at the same physical site. Both servers respond to DHCP client requests based on the load distribution ratio configured by the administrator. See the following example.

Load sharing in a single site with multiple subnets

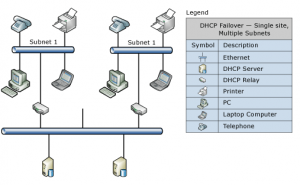
In the following example, two DHCP servers simultaneously provide IP addressing to clients on multiple subnets.


for more information and setting up an DHCP failover, see: http://technet.microsoft.com/en-us/library/hh831385.aspx


Get Server Uptime Using WMI

Retrieve Server Uptime

Uses the WMI to pull system uptime with WMI timeouts, it will useful when remote WMI not responding.

I have used it for a few hundred servers and it works fine. The initial test-connection uses only 1 ping, so that it can go through a large list of servers very easily.

If you found any bug then report to [email protected]

# Writer = Ritesh Parab; fb.com\parab.ritesh   
# File Name = Get-uptime 1.2 
# WMI Query time function added {Thanks to Technet forum} 

cls                                              
$erroractionpreference = "SilentlyContinue" 
# Helper Function - convert WMI date to TimeDate object 
function WMIDateStringToDate($Bootup) { 
 [System.Management.ManagementDateTimeconverter]::ToDateTime($Bootup) 
} 

# Main script 
$Computer = Get-Content "c:\Servers.txt" 

foreach ($system in $Computer) { 
$rtn = Test-Connection -ComputerName $system -Count 1 -BufferSize 16 -Quiet 
         IF($rtn -match 'True') { 
        $NameSpace = "Root\CIMV2" 
        $wmi = [WMISearcher]"" 
         $wmi.options.timeout = '0:0:15' #set timeout to 10 seconds 
         $query = 'Select * from Win32_OperatingSystem' 
         $wmi.scope.path = "\\$system\$NameSpace" 
         $wmi.query = $query 
          Try{ 
          $wmiresult = $wmi.Get() 
          #    $wmiresult 
            foreach ($wmioutput in $wmiresult){ 
               $Bootup = $wmioutput.LastBootUpTime 
               $LastBootUpTime = WMIDateStringToDate($Bootup) 
               $now = Get-Date 
               $Uptime = $now - $lastBootUpTime 
               $d = $Uptime.Days 
               $h = $Uptime.Hours 
               $m = $uptime.Minutes 
               $ms= $uptime.Milliseconds 
               $a = "$System Up for: {0} days, {1} hours, {2}.{3} minutes" -f $d,$h,$m,$ms 
               Write-Host "$a" -ForegroundColor Green 
                 } 
              } 
        Catch { 
                  Write-host "WMI not available on : $System" -ForegroundColor Red 
                Write-Output "WMI failed on $system because : $_" | Out-File "d:\failed.txt" -Force -Append  
          } 
        } 
        else{ 
            write-host "$system Offline" -ForegroundColor DarkRed 
            Write-Output "$system Offline" | Out-File 'd:\wintech\Get-Uptime\failed.txt' -Force -Append  
        } 
    }

http://gallery.technet.microsoft.com/scriptcenter/Get-Server-Uptime-Using-WMI-15aaa8ac

Determine when each user in the domain last logged on.

Run the following powershell script to determine the last logon date from the AD users.

Output will be written to c:\users.txt

# PSLastLogon.ps1
# PowerShell script to determine when each user in the domain last
# logged on.
#
# ----------------------------------------------------------------------
# Copyright (c) 2011 Richard L. Mueller
# Hilltop Lab web site - http://www.rlmueller.net
# Version 1.0 - March 16, 2011
#
# This program queries every Domain Controller in the domain to find the
# largest (latest) value of the lastLogon attribute for each user. The
# last logon dates for each user are converted into local time. The
# times are adjusted for daylight savings time, as presently configured.
#
# You have a royalty-free right to use, modify, reproduce, and
# distribute this script file in any way you find useful, provided that
# you agree that the copyright owner above has no warranty, obligations,
# or liability for such use.

Trap {"Error: $_"; Break;}
$file = "c:\users.txt"
$D = [System.DirectoryServices.ActiveDirectory.Domain]::GetCurrentDomain()
$Domain = [ADSI]"LDAP://$D"
$Searcher = New-Object System.DirectoryServices.DirectorySearcher
$Searcher.PageSize = 200
$Searcher.SearchScope = "subtree"

$Searcher.Filter = "(&(objectCategory=person)(objectClass=user))"
$Searcher.PropertiesToLoad.Add("distinguishedName") > $Null
$Searcher.PropertiesToLoad.Add("lastLogon") > $Null

# Create hash table of users and their last logon dates.
$arrUsers = @{}

# Enumerate all Domain Controllers.
ForEach ($DC In $D.DomainControllers)
{
    $Server = $DC.Name
    $Searcher.SearchRoot = "LDAP://$Server/" + $Domain.distinguishedName
    $Results = $Searcher.FindAll()
    ForEach ($Result In $Results)
    {
        $DN = $Result.Properties.Item("distinguishedName")
        $LL = $Result.Properties.Item("lastLogon")
        If ($LL.Count -eq 0)
        {
            $Last = [DateTime]0
        }
        Else
        {
            $Last = [DateTime]$LL.Item(0)
        }
        If ($Last -eq 0)
        {
            $LastLogon = $Last.AddYears(1600)
        }
        Else
        {
            $LastLogon = $Last.AddYears(1600).ToLocalTime()
        }
        If ($arrUsers.ContainsKey("$DN"))
        {
            If ($LastLogon -gt $arrUsers["$DN"])
            {
                $arrUsers["$DN"] = $LastLogon
            }
        }
        Else
        {
            $arrUsers.Add("$DN", $LastLogon)
        }
    }
}

# Output latest last logon date for each user.
$Users = $arrUsers.Keys
ForEach ($DN In $Users)
{
    $Date = $arrUsers["$DN"]
    "$DN;$Date" | Out-File $file -Append
}

Original script (without export to file) from: http://www.rlmueller.net/PowerShell/PSLastLogon.txt