Update a HA Netscaler environment

source:http://support.citrix.com/article/CTX127455

To update an HA netscaler, do the following steps.

User-added image

Upgrade the secondary netscaler appliance

    1. Save the config: save config
    2. Switch to shell: shell
    3. Change to the installation directory: cd /var/nsinstall
    4. Create a temporary directory: mkdir x.xnsinstall
    5. Chang to the created directory: cd x.xnsinstall
    6. Upload the files to the temporary directory (e.g. pscp build-11.0-66.11_nc.tgz nsroot@192.168.1.1:/var/nsinstall/11.0nsinstall/build-11.0-66.11_nc.tgz)
    7. Extract the files: tar -zxvf ns-x.0-xx.x-doc.tgz
    8. Install the software: # ./installns
    9. Press y to restart the appliance
    10. Check the state of the appliance: > show ha node
      This should state that it is the secondary node and synchronization is disabled. To disable the synchronization manually run the command: > set node -hasync disable
    11. Check the configuration
      The version can be found with the command:  > show version
    12. Failover the appliance: > force failover

Upgrade the primary netscaler appliance

  1. Follow step 1 to 9 mentioned in the previous section
  2. Check if the appliance is UP and it is the primary node: > show ha node
    If the appliance isn’t the primary application a failover can be initiated: > force failover

Enable Synchronization

  1. Log on the secondary node, check if it is the secondary node: > show node
  2. Enable synchronization: > set node -hasync enable
  3. Check synchronization status: > show ns runningconfig

The update has been completed. Additional backups can be removed as well the downloaded files in the created directory (step 4).

Disable all active users from an AD group

To disable all enabled users from an Active Directory group use the following script. Replace the groupname with the correct groupname. Also this script will show what it does, but does not disable the accounts until you remove the “-whatif” option from the command: Disable-ADAccount -Identity $user -whatif


The original script comes from https://community.spiceworks.com/topic/380100-disable-enable-ad-account-based-on-group-membership


$Group = "groupname"
Try { Import-Module ActiveDirectory -ErrorAction Stop }
Catch { Write-Host "Unable to load Active Directory module, is RSAT installed?"; Exit }

Try {
    $GroupDN = (Get-ADGroup $Group -ErrorAction Stop).DistinguishedName
}
Catch {
    Write-Host "Unable to locate group: $Group because ""$($Error[0])""" -ForegroundColor Red
    Exit
}

ForEach ($User in (Get-ADUser -Filter * -Properties MemberOf))
{   If ($User.MemberOf -contains $GroupDN)
    {   
        If ($user.enabled)
        {
            Write-Host "Disabling $($User.Name)"
            Disable-ADAccount -Identity $user -whatif
        }
    }
} 


Check last logged on date from user

Check the last logged on date for users. Fill in the correct filter (e.g. Name, Office) and the name of it (e.g. joe*


Import-Module ActiveDirectory

function Get-ADUserLastLogon([string]$userName)
{
  $dcs = Get-ADDomainController -Filter {Name -like "*"}
  $time = 0
  foreach($dc in $dcs)
  { 
    $hostname = $dc.HostName
    $user = Get-ADUser $userName | Get-ADObject -Properties lastLogon 
    if($user.LastLogon -gt $time) 
    {
      $time = $user.LastLogon
    }
  }
  $dt = [DateTime]::FromFileTime($time)
  Write-Host $username "last logged on at:" $dt }


foreach ($user in Get-ADUser -Filter 'Name -like "*joe*"' -Properties *) {
    Get-ADUserLastLogon -UserName $user
    }


Get Uptime with Powershell

Use the following script to determine the uptime of your servers which are defined in a text file:


# Writer = Ritesh Parab; fb.com\parab.ritesh  
# File Name = Get-uptime 1.2
# Description = Get Server up time 
# function Date and time copied from Technet :)
# Error Handling : TRY and CATCH
# Bugs are welcome 2 [email protected]
# Fix > WMI Query time function added {from technet forum}


cls                                             
$erroractionpreference = "SilentlyContinue"
# Helper Function - convert WMI date to TimeDate object
function WMIDateStringToDate($Bootup) {
 [System.Management.ManagementDateTimeconverter]::ToDateTime($Bootup)
}

# Main script
$Computer = Get-Content "c:\Servers.txt"

foreach ($system in $Computer) {
$rtn = Test-Connection -ComputerName $system -Count 1 -BufferSize 16 -Quiet
	 	IF($rtn -match 'True') {
		$NameSpace = "Root\CIMV2"
		$wmi = [WMISearcher]""
	 	$wmi.options.timeout = '0:0:15' #set timeout to 10 seconds
	 	$query = 'Select * from Win32_OperatingSystem'
	 	$wmi.scope.path = "\\$system\$NameSpace"
	 	$wmi.query = $query
	  	Try{
	  	$wmiresult = $wmi.Get()
	  	#	$wmiresult
			foreach ($wmioutput in $wmiresult){
			   $Bootup = $wmioutput.LastBootUpTime
			   $LastBootUpTime = WMIDateStringToDate($Bootup)
			   $now = Get-Date
			   $Uptime = $now - $lastBootUpTime
			   $d = $Uptime.Days
			   $h = $Uptime.Hours
			   $m = $uptime.Minutes
			   $ms= $uptime.Milliseconds
			   $a = "$System Up for: {0} days, {1} hours, {2}.{3} minutes" -f $d,$h,$m,$ms
			   Write-Host "$a" -ForegroundColor Green
	  		   }
	  		}
		Catch {
	  			Write-host "WMI not available on : $System" -ForegroundColor Red
				Write-Output "WMI failed on $system because : $_" | Out-File "c:\failed.txt" -Force -Append 
	  	}
		}
		else{
			write-host "$system Offline" -ForegroundColor DarkRed
			Write-Output "$system Offline" | Out-File 'c:\failed.txt' -Force -Append 
		}
	} 


Enabling Change Block Tracking (CBT) on a Virtual Machine (VMware vSphere 5.1)

Source: http://www.lazywinadmin.com/2013/01/enabling-change-block-tracking-cbt-on.html+


How to Enable CBT on your VM ? (PowerShell/PowerCli)

You can do the following even if your VM is Powered ON.

# Check and Add the PowerCli Snaping if not already present
if(-not(Get-PSSnapin -Registered -Name "VMware.VimAutomation.Core"){
    Add-PSSnapin -Name VMware.VimAutomation.Core}

# Connect to my Vcenter
Connect-VIServer -Server vcenter.fx.lab

#Here is aRunning the script on TESTSERVER04 to enable CBT
$vmtest = Get-vm TESTSERVER04 | get-view
$vmConfigSpec = New-Object VMware.Vim.VirtualMachineConfigSpec
$vmConfigSpec.changeTrackingEnabled = $true
$vmtest.reconfigVM($vmConfigSpec)

How to Apply this CBT configuration ?

Once you enable CBT, the VM must go through a stun-unstun cycle (power on, resume after suspend, migrate, or snapshot create/delete/revert) before the reconfiguration takes effect.

How to Check if CBT is enabled on your VM (PowerShell/PowerCli)

# Check if your VM has (Change Block Tracking) enabled or not
(Get-VM -Name TESTSERVER04).ExtensionData.Config.ChangeTrackingEnabled

# Find VMs where CBT (Change Block Tracking) is Enabled
Get-VM| Where-Object{$_.ExtensionData.Config.ChangeTrackingEnabled -eq $true}


Report DHCP Scope Settings using Powershell

Source: http://www.rivnet.ro/2013/06/report-dhcp-scope-settings-using-powershell.html


A script to export information from all authorized DHCP servers in the Active directory. It will export the following information to a csv file:

DHCPServer name, Scope Name, Subnet defined, Start and End Ranges, Lease Times, Description, DNS Server, Gateway


import-module DHCPServer
#Get all Authorized DCs from AD configuration
$DHCPs = Get-DhcpServerInDC
$filename = "d:\backup\dhcp\DHCPScopes_DNS_$(get-date -Uformat "%Y%m%d-%H%M%S").csv"

$Report = @()
$k = $null
write-host -foregroundcolor Green "`n`n`n`n`n`n`n`n`n"
foreach ($dhcp in $DHCPs) {
    $k++
    Write-Progress -activity "Getting DHCP scopes:" -status "Percent Done: " `
    -PercentComplete (($k / $DHCPs.Count)  * 100) -CurrentOperation "Now processing $($dhcp.DNSName)"
    $scopes = $null
    $scopes = (Get-DhcpServerv4Scope -ComputerName $dhcp.DNSName -ErrorAction:SilentlyContinue)
    If ($scopes -ne $null) {
        #getting global DNS settings, in case scopes are configured to inherit these settings
        $GlobalDNSList = $null
        $GlobalDNSList = (Get-DhcpServerv4OptionValue -OptionId 6 -ComputerName $dhcp.DNSName -ErrorAction:SilentlyContinue).Value
        $scopes | % {
            $row = "" | select Hostname,ScopeID,SubnetMask,Name,State,StartRange,EndRange,LeaseDuration,Description,DNS1,DNS2,DNS3,GDNS1,GDNS2,GDNS3,Router
            $row.Hostname = $dhcp.DNSName
            $row.ScopeID = $_.ScopeID
            $row.SubnetMask = $_.SubnetMask
            $row.Name = $_.Name
            $row.State = $_.State
            $row.StartRange = $_.StartRange
            $row.EndRange = $_.EndRange
            $row.LeaseDuration = $_.LeaseDuration
            $row.Description = $_.Description
            $ScopeDNSList = $null
            $ScopeDNSList = (Get-DhcpServerv4OptionValue -OptionId 6 -ScopeID $_.ScopeId -ComputerName $dhcp.DNSName -ErrorAction:SilentlyContinue).Value
            #write-host "Q: Use global scopes?: A: $(($ScopeDNSList -eq $null) -and ($GlobalDNSList -ne $null))"
            If (($ScopeDNSList -eq $null) -and ($GlobalDNSList -ne $null)) {
                $row.GDNS1 = $GlobalDNSList[0]
                $row.GDNS2 = $GlobalDNSList[1]
                $row.GDNS3 = $GlobalDNSList[2]
                $row.DNS1 = $GlobalDNSList[0]
                $row.DNS2 = $GlobalDNSList[1]
                $row.DNS3 = $GlobalDNSList[2]
                }
            Else {
                $row.DNS1 = $ScopeDNSList[0]
                $row.DNS2 = $ScopeDNSList[1]
                $row.DNS3 = $ScopeDNSList[2]
                }
            $router = (Get-DhcpServerv4OptionValue -ComputerName $dhcp.DNSName -OptionId 3 -ScopeID $_.ScopeId).Value
            $row.Router = $router[0]
            $Report += $row            }
        }
    Else {
        write-host -foregroundcolor Yellow """$($dhcp.DNSName)"" is either running Windows 2003, or is somehow not responding to querries. Adding to report as blank"
        $row = "" | select Hostname,ScopeID,SubnetMask,Name,State,StartRange,EndRange,LeaseDuration,Description,DNS1,DNS2,DNS3,GDNS1,GDNS2,GDNS3,Router
        $row.Hostname = $dhcp.DNSName
        $Report += $row
        }
    write-host -foregroundcolor Green "Done Processing ""$($dhcp.DNSName)"""
    }

$Report  | Export-csv -NoTypeInformation -UseCulture $filename


Excel AddIn to reset the last worksheet cell

source: http://xsformatcleaner.codeplex.com/

Microsoft Excel saves only the part of each worksheet that is in use, meaning the section that contains data or formatting. Sometimes the last cell of a worksheet may be beyond the range of your actual used data. This issue may cause you to have a larger file size than neccesary, you may print extra pages, you may receive “Out of Memory” error messages, or you may experience other unusual behavior. Clearing the excess rows and columns to reset the last cell can help to resolve these issues.

Note You can locate the last cell of the active worksheet by pressing CTRL+SHIFT+END.

This is a sample of the code located in Microsoft KB 244435
How to reset the last cell in Excel
http://support.microsoft.com/kb/244435


[wpdm_file id=85]

Easily audit and install patches on your servers in the network by providing a graphical interf

Project Description
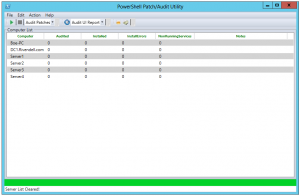
PoshPAIG allows you to easily audit and install patches on your servers in the network by providing a graphical interface

The utility works in any environment, but the optimal environment is a where you have a local WSUS server and your systems have Windows Update settings configured to “Download updates and do not install” either through Group Policy or local policy.

Due to licensing issues, please download PSExec.exe from the link below and place in the root of the UI folder, otherwise the Install portion will fail
http://technet.microsoft.com/en-us/sysinternals/bb897553

Version 2.1.5 has been released!
Please see release notes in the downloads section for new features/bug fixes.
http://poshpaig.codeplex.com/releases/view/100929
Capture

Hey, Scripting Guy articles:
http://blogs.technet.com/b/heyscriptingguy/archive/2011/08/13/use-powershell-to-audit-and-install-windows-patches.aspx
http://blogs.technet.com/b/heyscriptingguy/archive/2011/08/14/lessons-learned-while-writing-the-powershell-poshpaig-module.aspx

A list of new features available are:

  • Updated ListView UI
  • PSJobs replaced with Background runspaces for better performance
  • New reports for installed updates
  • Keyboard Shortcuts
    • F1: Display Help
    • F5: Run the selected command. Ex. Audit Patches,Install Patches
    • F8: Run a select report to generate
    • Ctrl+E: Exits the PoshPAIG applicaton
    • Ctrl+A: Select all systems in the Computer List
    • Ctrl+O: Opens up the Options menu
    • Ctrl+S: Opens window up to add more systems to Computer List
    • Ctrl+D: Removes a selected System or Systems
  • Services Reporting for non-running services set to Automatic
  • New UI changes
  • Better interaction with Windows Update Service
  • New reporting options available
  • Options menu to adjust some settings
  • MultiThreading of operations (Supports running 20 jobs at one time) without UI freeze
  • Add multiple computers with Add Server button using comma to separate each server
  • Select multiple computers in server list and perform operations on only those servers
  • Able to reboot systems with a monitored reboot
  • Ping sweep of all systems in server list
  • View windowsupdate.log on an individual server
  • View installed updates on servers
  • Remotely run wuauclt /detectnow on servers
  • Generate host list of servers
  • Sort columns
  • Notes column to track running operations
  • Error report

The PowerShell Patch Audit/Installation GUI started out as a project for work to build an interface to perform the patching of our systems to those who were not familiar enough with PowerShell to run a set of scripts I build to perform the same auditing and installation of patches. This product is currently in Alpha as there are some bugs that need to be squashed as well as other features I need to add to the tool as well as updating some some current features.

A blog post about this is available at http://learn-powershell.net/2011/06/03/powershell-patch-auditinstall-gui-poshpaig-released/

What this tool gives you is a way to first audit your systems which you can supply one of many ways. You can supply a list of systems, pull a list from Active Directory or manually add the systems yourself into the utility.

One of the best features about this tool is that it uses background jobs to perform all of the actions while the front end GUI is not affected. This means that you can freely move the GUI around as it does not get locked up like a normal WPF gui would in PowerShell if you attempted to run a job of some kind. You will also notice that the data in the GUI updates automatically as each job finishes for a server. For instance, if you are Auditing for patches, you will start seeing the number of patches waiting to be installed start updating next to each respective server. Same for Installing patches, the total number of installed patches, along with patches that gave an error when installing will be displayed in the GUI’s data window. Also, a progress bar is at the bottom of the GUI and status bar to show you how far along the process is.

After an Audit or Installation is performed, there are options to generate a Grid-View report for viewing or a CSV report can easily be generated to the default location of the GUI in no time!

Next version
The next version will have the following items that I am working on:

  • Better displaying of services report to allow restart
  • UI updates for grid view
  • Updated code and reporting
  • Various feature/bug requests


Project page: http://poshpaig.codeplex.com/

Download software: [wpdm_file id=84]