Determine when each user in the domain last logged on.

Run the following powershell script to determine the last logon date from the AD users.

Output will be written to c:\users.txt

# PSLastLogon.ps1
# PowerShell script to determine when each user in the domain last
# logged on.
#
# ----------------------------------------------------------------------
# Copyright (c) 2011 Richard L. Mueller
# Hilltop Lab web site - http://www.rlmueller.net
# Version 1.0 - March 16, 2011
#
# This program queries every Domain Controller in the domain to find the
# largest (latest) value of the lastLogon attribute for each user. The
# last logon dates for each user are converted into local time. The
# times are adjusted for daylight savings time, as presently configured.
#
# You have a royalty-free right to use, modify, reproduce, and
# distribute this script file in any way you find useful, provided that
# you agree that the copyright owner above has no warranty, obligations,
# or liability for such use.

Trap {"Error: $_"; Break;}
$file = "c:\users.txt"
$D = [System.DirectoryServices.ActiveDirectory.Domain]::GetCurrentDomain()
$Domain = [ADSI]"LDAP://$D"
$Searcher = New-Object System.DirectoryServices.DirectorySearcher
$Searcher.PageSize = 200
$Searcher.SearchScope = "subtree"

$Searcher.Filter = "(&(objectCategory=person)(objectClass=user))"
$Searcher.PropertiesToLoad.Add("distinguishedName") > $Null
$Searcher.PropertiesToLoad.Add("lastLogon") > $Null

# Create hash table of users and their last logon dates.
$arrUsers = @{}

# Enumerate all Domain Controllers.
ForEach ($DC In $D.DomainControllers)
{
    $Server = $DC.Name
    $Searcher.SearchRoot = "LDAP://$Server/" + $Domain.distinguishedName
    $Results = $Searcher.FindAll()
    ForEach ($Result In $Results)
    {
        $DN = $Result.Properties.Item("distinguishedName")
        $LL = $Result.Properties.Item("lastLogon")
        If ($LL.Count -eq 0)
        {
            $Last = [DateTime]0
        }
        Else
        {
            $Last = [DateTime]$LL.Item(0)
        }
        If ($Last -eq 0)
        {
            $LastLogon = $Last.AddYears(1600)
        }
        Else
        {
            $LastLogon = $Last.AddYears(1600).ToLocalTime()
        }
        If ($arrUsers.ContainsKey("$DN"))
        {
            If ($LastLogon -gt $arrUsers["$DN"])
            {
                $arrUsers["$DN"] = $LastLogon
            }
        }
        Else
        {
            $arrUsers.Add("$DN", $LastLogon)
        }
    }
}

# Output latest last logon date for each user.
$Users = $arrUsers.Keys
ForEach ($DN In $Users)
{
    $Date = $arrUsers["$DN"]
    "$DN;$Date" | Out-File $file -Append
}

Original script (without export to file) from: http://www.rlmueller.net/PowerShell/PSLastLogon.txt
Sample PowerShell Scripts with OMSA

(http://en.community.dell.com/techcenter/systems-management/w/wiki/sample-powershell-scripts-with-omsa.aspx)

sample Function to launch DRAC, based on computer name

Below are sample PowerShell scripts for querying data from OMSA – download the attached .txt file for all the examples.

get-wmiobject -namespace root\cimv2\dell -computer Server1 -list | sort-object name Displays all classes int he root\cimv2\dell namespace on Server1
$a = get-wmiobject dell_chassis -namespace root\cimv2\dell -computer Server1
$a | select-object AmpStatus, EsmLogStatus, FanRedStatus, FanStatus, MemStatus, Model, ProcStatus, PsRedStatus, PsStatus, SecurityBreach, SerialNumber, Status, SystemClass, TempStatus, VoltStatus, VrmStatus
Displayoverall hardware status based on info from Dell_Chassis
$a = get-wmiobject Dell_baseboard -namespace root\cimv2\dell -computer Server1
$a.PartNumber, $a.BaseBoardTypeDescString
Display the part number of the motherboard
$a = get-wmiobject cim_PhysicalMemory -namespace root\cimv2\dell -computer Server1
$a | select-object capacity, datawidth, formfactor, memorytype, name, speedasstring, status, tag, totalwidth | format-table
Displays Physical Memory information (speed, type, etc)
$a = get-wmiobject cim_temperaturesensor -namespace root\cimv2\dell -computer Server1
$a | select-object baseunits, CurrentReading, LowerThresholdCritical, LowerThresholdNonCritical, name, status, unitmodifier, upperthresholdcritical,upperthresholdnoncritical
Show Current Temperature sensor information (CurrentReading in Celsius)
get-wmiobject cim_tachometer -namespace root\cimv2\dell -computer Server1 | select-object Name, CurrentReading Displays Current Fan Speed
get-wmiobject cim_fru -namespace root\cimv2\dell -computer Server1 | select-object DeviceID, FRUManufacturerName, FRUPartNumberName, FRUSerialNumberName Displays “Field Replaceable Units” (FRU) information for specific components
get-wmiobject cim_powersupply -namespace root\cimv2\dell -computer Server1 | select-object name, DeviceID, Status, TotalOutputPower Displays the total output power of the supply – in milliwatts
get-wmiobject cim_processor -namespace root\cimv2\dell -computer Server1 | select-object CoreCount, CoreEnabledCount, CPUStatus, CurrentClockSpeed, DeviceID, MaxClockSpeed, Name | ft -autosize Displays processor information
get-wmiobject dell_networkport -namespace root\cimv2\dell -computer Server1 | select-object OSAdapterDescription, IsTOEEnable Displays if TCP Offload Engine (TOE) is enabled
$a = get-wmiobject DELL_PowerConsumptionData -namespace root\cimv2\dell -computer Server1
$a | select-object Name, CumulativePowerReading, maxPowerConsumption, minPowerConsumption, parStartTime, parTime, peakAmpReading, peakHeadRoom, peakWattReading, powerCap, powerCapCapabilities, pwrStartTime, pwrTime, Status
Displays valuable power consumption information – shows “CumulativePowerReading based from pwrStartTime, as well as min/max power consumption, and peak amps, watts, etc.
get-wmiobject CIM_BIOSElement -namespace root\cimv2\dell -computer Server1 | select-object InstallDate, Name, Version Displays BIOS Version, and installation date
get-wmiobject CIM_BIOSElement -namespace root\cimv2\dell -computer Server1 | % {$_.ConvertToDateTime($_.InstallDate), $_.Name, $_.Version} Convert BIOS Install Date time to a friendly date/time
get-wmiobject DELL_Firmware -namespace root\cimv2\dell -computer Server1 | select-object Name, Version Displays DRAC Version information
get-wmiobject Dell_SoftwareFeature -namespace root\cimv2\dell -computer Server1 | select-object Description, OmsaURL, Version Displays the OMSAURL used to connect to DRAC
function LaunchDrac($strComputerName)
{
$a = get-wmiobject Dell_SoftwareFeature -namespace root\cimv2\dell -computer $strComputerName | select-object Description, OmsaURL, Version
$ie = new-object -comobject InternetExplorer.Application
$ie.visible = $true
$ie.navigate(($a.omsaurl.split(‘,’))[0])
}
sample Function to launch DRAC, based on computer name

SQL Server 2008 R2 – Unattended Silent Install

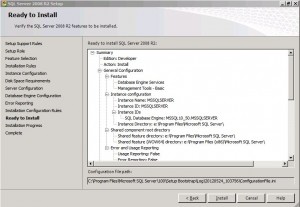
To create an Unattended Silent Install, you first need a configuration file with all the right settings in it. To create the file, run a installation of SQL and select all required settings. Continue the installation until you reach the “Ready To Install” step. In this step you will see the location of the configuration file (see the image below).


In this case it is: C:\program files\microsoft sql server\100\setup bootstrap\log\20120524_103756\configurationfile.ini

You can cancel the setup proces now.


Edit the configuration file as follows:


  • Set QUIET to “True”. This specifies that Setup will run in a quiet mode without any user interface (i.e. unattended installation)QUIET=”True”
  • Add IACCEPTSQLSERVERLICENSETERMS and set its value to “True”. This is to required to acknowledge acceptance of the license terms when the /Q (i.e. QUIET) parameter is specified for unattended installations.ACCEPTSQLSERVERLICENSETERMS=”True”
  • Remove the UIMODE parameter as it can’t be used with the QUITE parameter.
  • IF used SQL as the Securitymode, use SAPWD to set a password for the SA account
    SAPWD=”a complex password”
  • Set TCPENABLED to yes if you want external connections to you SQL instance
    TCPENABLED=”1″


Now you have your configuration file ready run SQL with the following command:

“<path to SQL setup folder>\setup.exe” /ConfigurationFile=”<path to config file>”

How to Set or Change a Dell PowerEdge Service Tag

Source: http://lonesysadmin.net/2011/03/08/how-to-set-a-dell-poweredge-service-tag/


Got a Dell PowerEdge that you replaced the motherboard on, and now it doesn’t have a service tag? Reset it with the asset.com tool, which I’ve conveniently packaged as both a floppy disk image and an ISO for those of us in need. They both use the Windows 7 boot disk DOS and asset_A209.com from ftp.dell.com (renamed to asset.com).

[wpdm_file id=50]

[wpdm_file id=51]

Once you boot from these you can set the service tag with:

asset /s <service tag>

You can also set the asset tag with:

asset <asset tag>

Or clear the asset tag with:

asset /d

Check FSMO Roles

Run the following vbs script to show you the location off the FSMO roles:


Set objRootDSE = GetObject("LDAP://rootDSE")

Set objSchema = GetObject _
    ("LDAP://" & objRootDSE.Get("schemaNamingContext"))
strSchemaMaster = objSchema.Get("fSMORoleOwner")
Set objNtds = GetObject("LDAP://" & strSchemaMaster)
Set objComputer = GetObject(objNtds.Parent)
WScript.Echo "Forest-wide Schema Master FSMO: " & objComputer.Name

Set objNtds = Nothing
Set objComputer = Nothing

Set objPartitions = GetObject("LDAP://CN=Partitions," & _
    objRootDSE.Get("configurationNamingContext"))
strDomainNamingMaster = objPartitions.Get("fSMORoleOwner")
Set objNtds = GetObject("LDAP://" & strDomainNamingMaster)
Set objComputer = GetObject(objNtds.Parent)
WScript.Echo "Forest-wide Domain Naming Master FSMO: " & objComputer.Name

Set objDomain = GetObject _
    ("LDAP://" & objRootDSE.Get("defaultNamingContext"))
strPdcEmulator = objDomain.Get("fSMORoleOwner")
Set objNtds = GetObject("LDAP://" & strPdcEmulator)
Set objComputer = GetObject(objNtds.Parent)
WScript.Echo "Domain's PDC Emulator FSMO: " & objComputer.Name

Set objRidManager = GetObject("LDAP://CN=RID Manager$,CN=System," & _
    objRootDSE.Get("defaultNamingContext"))
strRidMaster = objRidManager.Get("fSMORoleOwner")
Set objNtds = GetObject("LDAP://" & strRidMaster)
Set objComputer = GetObject(objNtds.Parent)
WScript.Echo "Domain's RID Master FSMO: " & objComputer.Name

Set objInfrastructure = GetObject("LDAP://CN=Infrastructure," & _
    objRootDSE.Get("defaultNamingContext"))
strInfrastructureMaster = objInfrastructure.Get("fSMORoleOwner")
Set objNtds = GetObject("LDAP://" & strInfrastructureMaster)
Set objComputer = GetObject(objNtds.Parent)
WScript.Echo "Domain's Infrastructure Master FSMO: " & objComputer.Name


download link: [wpdm_file id=49]

Delete files older then n days (VBS)

Here is a VBS script to delete all file older then 10 days in d:\backup.

Set the active constraint to “True” if you want to delete the files.


Const Active = False
Const sSource = "d:\backup"
Const MaxAge = 10 'days
Const Recursive = True

Checked = 0
Deleted = 0

Set oFSO = CreateObject("Scripting.FileSystemObject")
if active then verb = "Deleting """ Else verb = "Old file: """
CheckFolder oFSO.GetFolder(sSource)

WScript.echo
if Active then verb = " file(s) deleted" Else verb = " file(s) would be
deleted"
WScript.Echo Checked & " file(s) checked, " & Deleted & verb

Sub CheckFolder (oFldr)
For Each oFile In oFldr.Files
Checked = Checked + 1
If DateDiff("D", oFile.DateLastModified, Now()) > MaxAge Then
Deleted = Deleted + 1
WScript.Echo verb & oFile.Path & """"
If Active Then oFile.Delete
End If
Next

if not Recursive then Exit Sub
For Each oSubfolder In oFldr.Subfolders
CheckFolder(oSubfolder)
Next
End Sub

How to send email from a VBS file.

Local Email Server

This is the standard method. It assumes an SMTP email server is installed on your machine. This is the case on most web servers.

 Set objMessage = CreateObject("CDO.Message") 
 objMessage.Subject = "Subject"
 objMessage.Sender = "[email protected]"
 objMessage.To = "[email protected]"
 objMessage.TextBody = "iMacros script completed. Status = OK"
 objMessage.Send

Substitute your own email information and message text. You can insert this code into any script that requires a message to be sent.

Remote Email Server

This code shows you how to use a remotes server rather than the SMTP server on your own machine.

 Set objMessage = CreateObject("CDO.Message") 
 objMessage.Subject = "iMacros Message" 
 objMessage.From = "[email protected]" 
 objMessage.To = "[email protected]" 
 objMessage.TextBody = "iMacros script completed. Status = OK

 '==This section provides the configuration information for the remote SMTP server.
 '==Normally you will only change the server name or IP.
 objMessage.Configuration.Fields.Item _
 ("http://schemas.microsoft.com/cdo/configuration/sendusing") = 2 
 'Name or IP of Remote SMTP Server
 objMessage.Configuration.Fields.Item _
 ("http://schemas.microsoft.com/cdo/configuration/smtpserver") = "smtp.myserver.com"
 'Server port (typically 25)
 objMessage.Configuration.Fields.Item _
 ("http://schemas.microsoft.com/cdo/configuration/smtpserverport") = 25  
 objMessage.Configuration.Fields.Update
 '==End remote SMTP server configuration section==

 objMessage.Send

Remote Email Server with Password

Sending a text email using authentication against a remote SMTP server. More and more administrators are restricting access to their servers to control spam or limit which users may utilize the server. This example shows you how to use basic authentication, the most commonly used authentication method, when the SMTP server you are using requires it.

This code is slightly more complex but not very difficult to understand or work with.

 Const cdoSendUsingPickup = 1 'Send message using the local SMTP service pickup directory. 
 Const cdoSendUsingPort = 2 'Send the message using the network (SMTP over the network). 

 Const cdoAnonymous = 0 'Do not authenticate
 Const cdoBasic = 1 'basic (clear-text) authentication
 Const cdoNTLM = 2 'NTLM

 Set objMessage = CreateObject("CDO.Message") 
 objMessage.Subject = "iMacros Status Message" 
 objMessage.From = """iMacros"" " 
 objMessage.To = "[email protected]" 
 objMessage.TextBody = "iMacros script completed. Status = OK"

 '==This section provides the configuration information for the remote SMTP server.

 objMessage.Configuration.Fields.Item _
 ("http://schemas.microsoft.com/cdo/configuration/sendusing") = 2 

 'Name or IP of Remote SMTP Server
 objMessage.Configuration.Fields.Item _
 ("http://schemas.microsoft.com/cdo/configuration/smtpserver") = "mail.your.com"

 'Type of authentication, NONE, Basic (Base64 encoded), NTLM
 objMessage.Configuration.Fields.Item _
 ("http://schemas.microsoft.com/cdo/configuration/smtpauthenticate") = cdoBasic

 'Your UserID on the SMTP server
 objMessage.Configuration.Fields.Item _
  ("http://schemas.microsoft.com/cdo/configuration/sendusername") = "youruserid"

 'Your password on the SMTP server
 objMessage.Configuration.Fields.Item _
 ("http://schemas.microsoft.com/cdo/configuration/sendpassword") = "yourpassword"

 'Server port (typically 25)
 objMessage.Configuration.Fields.Item _
 ("http://schemas.microsoft.com/cdo/configuration/smtpserverport") = 25 

 'Use SSL for the connection (False or True)
 objMessage.Configuration.Fields.Item _
 ("http://schemas.microsoft.com/cdo/configuration/smtpusessl") = False

 'Connection Timeout in seconds (the maximum time CDO will try to establish a connection to the SMTP   server)
 objMessage.Configuration.Fields.Item _
 ("http://schemas.microsoft.com/cdo/configuration/smtpconnectiontimeout") = 60

 objMessage.Configuration.Fields.Update

 '==End remote SMTP server configuration section==  

 objMessage.Send

Send email with MAPI

This solution assumes that Outlook or another email client with MAPI support is installed.

 Dim ToAddress
 Dim MessageSubject
 Dim MessageBody
 Dim MessageAttachment

 Dim ol, ns, newMail

 ToAddress = "Jim, Test"   ' change this...
 MessageSubject = "iMacros"
 MessageBody = "iMacros Status = OK"

 Set ol = WScript.CreateObject("Outlook.Application")
 Set ns = ol.getNamespace("MAPI")
 ns.logon "","",true,false
 Set newMail = ol.CreateItem(olMailItem)
 newMail.Subject = MessageSubject
 newMail.Body = MessageBody & vbCrLf

 ' validate the recipient, just in case...
 Set myRecipient = ns.CreateRecipient(ToAddress)
 myRecipient.Resolve
 If Not myRecipient.Resolved Then
 MsgBox "unknown recipient"
 Else
    newMail.Recipients.Add(myRecipient)
    newMail.Send
 End If

 Set ol = Nothing

Source: http://wiki.imacros.net/send-email.vbs

Backup file permissions [icacls.exe]

A simple tool to backup/restore file permissions is the tool: icacls.exe

To backup the file permissions on the e:\folder\* run the following program:
>icacls.exe E:\folder\* /save E:\cacls.txt /t /c

To restore them later you can run:
>icacls.exe E:\folder\ /restore E:\cacls.txt

Icacls.exe can handle logical drives, network drives and UNC paths.

VBS – Check Folder/File size

Below is an example off a VBS script to monitor the size of a directory or a file. If the size is larger then the size specified it will mail a message with a warning.

Script to monitor a folder:

strFolderToMonitor = "C:\TEST"
intSizeInGB = 12
intSizeInBytes  = (intSizeInGB * 1024 * 1024 * 1024)
Set objFSO = CreateObject("Scripting.FileSystemObject")
Set objFolder = objFSO.GetFolder(strFolderToMonitor) 

If objFolder.Size > intSizeInBytes Then
  Set objMessage = CreateObject("CDO.Message")
  objMessage.From = "[email protected]"
  objMessage.To = "[email protected]"
  objMessage.Subject = "Folder " & strFolderToMonitor & " exceeded " & intSizeInGB & "GB"
  objMessage.TextBody = "The folder " & strFolderToMonitor & " has exceeded " & intSizeInGB & "GB.  Please panic in an orderly fashion." 

  objMessage.Configuration.Fields.Item ("http://schemas.microsoft.com/cdo/configuration/sendusing") = 2
  objMessage.Configuration.Fields.Item ("http://schemas.microsoft.com/cdo/configuration/smtpserver") = "mail.domain.suffix"
  objMessage.Configuration.Fields.Item ("http://schemas.microsoft.com/cdo/configuration/smtpserverport") = 25
  objMessage.Configuration.Fields.Update 

  objMessage.Send
End If


Script to monitor a file:

strFileToMonitor = "C:\TEST\TEST.TXT"
intSizeInGB = 30
intSizeInBytes  = (intSizeInGB * 1024 * 1024 * 1024)
Set objFSO = CreateObject("Scripting.FileSystemObject")
Set objFile = objFSO.GetFile(strFileToMonitor)

'If objFolder.Size > intSizeInBytes Then
If objFile.Size > intSizeInBytes Then
  Set objMessage = CreateObject("CDO.Message")
  objMessage.From = "[email protected]"
  objMessage.To = "[email protected]"
  objMessage.Subject = "File " & strFileToMonitor & " exceeded " & intSizeInGB & "GB"
  objMessage.TextBody = "The file " & strFileToMonitor & " has exceeded " & intSizeInGB & "GB." & chr(10) & chr(13) & "Please panic in an orderly fashion." 

  objMessage.Configuration.Fields.Item ("http://schemas.microsoft.com/cdo/configuration/sendusing") = 2
  objMessage.Configuration.Fields.Item ("http://schemas.microsoft.com/cdo/configuration/smtpserver") = "mail.domain.suffix"
  objMessage.Configuration.Fields.Item ("http://schemas.microsoft.com/cdo/configuration/smtpserverport") = 25
  objMessage.Configuration.Fields.Update 

  objMessage.Send
End If


Or download the files here:

[wpdm_file id=”19″]

[wpdm_file id=”20″]

MsSQL: Database in restoring state

When a MsSQL database has a mirror and something goes wrong, the database can end up in a restoring state. To force a recover of the database use the following command:

  • restore database <database> with recovery

This will make the database go on line.

To delete the database, use the following command:

  • drop database <db>

This command will remove the database and database files.