How to enable the Disk Cleanup tool on Windows Server 2008 R2

source: https://support.appliedi.net/kb/a110/how-to-enable-the-disk-cleanup-tool-on-windows-server-2008-r2.aspx

How to enable the Disk Cleanup tool:

1) Go to Programs & Features, and in the Features section, enable/install “Desktop Experience”.   The downside to this is that you will need to reboot your server after installing this and it installs other components you do not need on a server.

2) [RECOMMENDED] –  All you really need to do is copy some files that are already located on your server into specific system folders, as described at http://technet.microsoft.com/en-us/library/ff630161(WS.10).aspx

The location of the files you need to copy depend on your version of Windows:

Operating System Architecture File Location
Windows Server 2008 R2 64-bit C:\Windows\winsxs\amd64_microsoft-windows-cleanmgr_31bf3856ad364e35_6.1.7600.16385_none_c9392808773cd7da\cleanmgr.exe
Windows Server 2008 R2 64-bit C:\Windows\winsxs\amd64_microsoft-windows-cleanmgr.resources_31bf3856ad364e35_6.1.7600.16385_en-us_b9cb6194b257cc63\cleanmgr.exe.mui
Windows Server 2008 64-bit C:\Windows\winsxs\amd64_microsoft-windows-cleanmgr.resources_31bf3856ad364e35_6.0.6001.18000_en-us_b9f50b71510436f2\cleanmgr.exe.mui
Windows Server 2008 64-bit C:\Windows\winsxs\amd64_microsoft-windows-cleanmgr_31bf3856ad364e35_6.0.6001.18000_none_c962d1e515e94269\cleanmgr.exe.mui
Windows Server 2008 32-bit C:\Windows\winsxs\x86_microsoft-windows-cleanmgr.resources_31bf3856ad364e35_6.0.6001.18000_en-us_5dd66fed98a6c5bc\cleanmgr.exe.mui
Windows Server 2008 32-bit C:\Windows\winsxs\x86_microsoft-windows-cleanmgr_31bf3856ad364e35_6.0.6001.18000_none_6d4436615d8bd133\cleanmgr.exe

Windows Server 2012:

C:\Windows\WinSxS\amd64_microsoft-windows-cleanmgr_31bf3856ad364e35_6.2.9200.16384_none_c60dddc5e750072a\cleanmgr.exe
C:\Windows\WinSxS\amd64_microsoft-windows-cleanmgr.resources_31bf3856ad364e35_6.2.9200.16384_en-us_b6a01752226afbb3\cleanmgr.exe.mui

Windows Server 2012 R2:  must install Desktop Experience. Use Powershell command:
Install-WindowsFeature Desktop-Experience


Once you’ve located the files move them to the following locations (Server 2012 non-R2 and earlier):

  1. Copy Cleanmgr.exe to %systemroot%\System32.
  2. Copy Cleanmgr.exe.mui to %systemroot%\System32\en-US.

You can now launch the Disk cleanup tool by running Cleanmgr.exe from the command prompt.

If an old cleanup manager is used, windows update files will not be cleaned. For this you need Microsoft hotfix 2852386
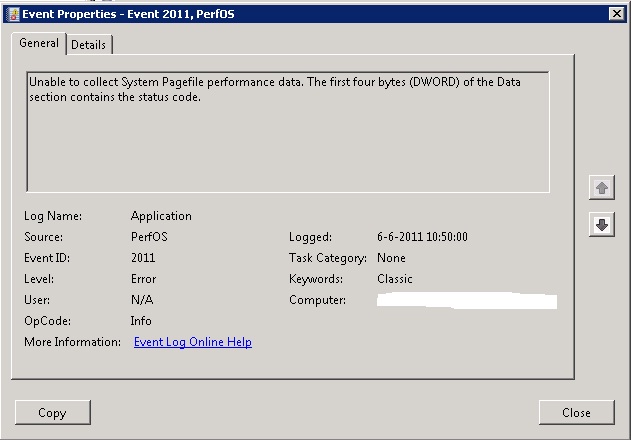
Delete files older then n days (VBS)

Here is a VBS script to delete all file older then 10 days in d:\backup.

Set the active constraint to “True” if you want to delete the files.


Const Active = False
Const sSource = "d:\backup"
Const MaxAge = 10 'days
Const Recursive = True

Checked = 0
Deleted = 0

Set oFSO = CreateObject("Scripting.FileSystemObject")
if active then verb = "Deleting """ Else verb = "Old file: """
CheckFolder oFSO.GetFolder(sSource)

WScript.echo
if Active then verb = " file(s) deleted" Else verb = " file(s) would be
deleted"
WScript.Echo Checked & " file(s) checked, " & Deleted & verb

Sub CheckFolder (oFldr)
For Each oFile In oFldr.Files
Checked = Checked + 1
If DateDiff("D", oFile.DateLastModified, Now()) > MaxAge Then
Deleted = Deleted + 1
WScript.Echo verb & oFile.Path & """"
If Active Then oFile.Delete
End If
Next

if not Recursive then Exit Sub
For Each oSubfolder In oFldr.Subfolders
CheckFolder(oSubfolder)
Next
End Sub

AdminSDHolder (ACL’s disappeared on object)

Source: http://msmvps.com/blogs/ulfbsimonweidner/archive/2005/05/29/49659.aspx

Symptom
Usually you delegate permission in Active Directory via OUs. Those permissions apply (if configured so) to objects like users underneath that OU. However you may experience that they don’t apply to all user-accounts (e.g. a delegated admin is able to change the phonenumber for most users, but not on a few others), or that the permissions are being reset/lost on some accounts. If you look at the permissions of that user-account you’ll find that the accounts security-descriptor is set not to inherit permissions from parent objects. If you set the security-descriptor to inherit permissions again, you’ll see that this will be reset after a while. If you configure permissions directly on the object they will be reset after a while as well.

Reason
Active Directory protects certain accounts not to inherit delegated permission. This behavior applies to direct and nested members of the following security-groups:

Windows 2000 SP3:
Enterprise Admins
Schema Admins
Domain Admins
Administrators

Windows 2000 SP4 or Windows Server 2003 additional:
Account Operators
Server Operators
Print Operators
Backup Operators
Cert Publishers

Additional the accounts Administrator and krbtgt are protected.

Why are those accounts protected?
Delegation via AD permissions is usually used to delegate administrative rights to regular user-accounts, to implement administrative roles like Site-Administrator. Those might be assigned to reset passwords, deactivate accounts or other tasks. The AdminSdHolder-Thread assures that such an administrative roles gains not more permissions or is able to compromise the privileged accounts.

How are those accounts protected?
The AdminSdHolder/Ds Propagator tread modifies all accounts which are direct or nested members of one of those groups and increases the attribut adminCount to a value higher than 0. This thread runs once an hour on the Domaincontroller holding the PDC-Emulator role. The thread further resets the security-descriptor of those accounts with the default permissions for administrative accounts which is defined by the security-descriptor of the object cn=AdminSdHolder,cn=System,dc=yourdomain,dc=com. This also resets the flag to disable inheritance of parent objects.

But what can I do if I need different permissions?
If you need different permissions on those accounts there are a few approaches you can take:

  1. Usually you should avoid using administrative accounts for the daily routine. Use a regular user-account, and just start administrative applications (such as Active Directory-Users and -Computers) with administrative credentials (via RunAs or Context-Menu, Open with…).
    Active Directory enabled applications or Site-Admins would be able to change the regular user-account of the Administrators, which is usually sufficient, but their administrative accounts are protected. This protects the Administrator from administrative errors of delegated administrators, and he’s further protected against virusses/worms when surfing the web/reading e-mail.
  2. You could use a domain-admin account for AD-enabled applications: This would be a solution, but should be avoided whenever possible. It’s quite easy to delegate AD-integrated applications only write-permissions to the attributes they need, so use that feature to protect your AD. Many times those applications only need permissions to add/modify/delete objects which are defined by their schema extension, and write-permissions on attributes on existing objects their schema extension also added.
  3. If absolutely necessary you are able to change the default permissions on administrative accounts to reflect the need of those applications. You can easily do this by modifying the permissions on cn=AdminSdHolder,cn=System,dc=yourdomain,dc=com. This can be accomblished using ADSIEdit.msc or DsAcls.exe. DsAcls is a commandline-tool for modifying AD-permissions, which every administrator who delegates rights in AD should know. Be sure to test in advance which attributes of which objects are being modifies by the application.

What else is important to know?

  1. AdminSdHolder also applies the permissions to accounts which are nested members through distribution groups. E.g. if User1 is a member of the distribution group Maillist-KnowHow, which is a member of account operators, then User1 is considered as one of the protected accounts (since the distribution group could be converted to a security group).
    Be aware that the command whoami /all does show nested group memberships, but not nested groups through distribution groups.
    Usually you should avoid nesting distribution groups in one of the protected groups.
  2. Users, which are removed out of one of the protected groups (or their nested groups) do not inherit permissions from parent objects. You need to check the box to inherit permissions when removing those users out of the group manually, or use a script to check your users.
    If you have many accounts which are protected by the AdminSdHolder/DS Propagation-Thread, you might notice that the lsass-process on the Domaincontrller holding the PDC-Emultor raises to 100% once an hour. Therefore you should avoid putting loads of users in the protected groups, and rather use delegated administration whenever possible.
  3. Depending on your need you might want to remove Backup Operators, Printer Operators, Server Operators or Account Operators out of the AdminSdHolder protection. You can get a Hotfix at Microsoft PSS which allows to configure that. See the following KB for more informations on that:
    http://support.microsoft.com?id=817433

NTP Active Directory

PDC Emulator Configuration (Forest Root Domain)


Before starting any configuration, you need to make sure that you can access an external reliable NTP server.  If you are struggling to find one, a pool of load balanced NTP servers is available on the Internet in the NTP Pool project.  This project will have servers close to you which will provide you with marginally higher accuracy based on reduced round trip inconsistencies.  Have a look at http://www.pool.ntp.org to find an NTP Pool near you.  Remember that you will need UDP port 123 assess from your PDC Emulator to the desired Internet based NTP server.

Next, find the PDC Emulator.  You can find the PDC Emulator for the domain using the “netdom query fsmo” command on any domain controller.

On the PDC Emulator, let’s first clear all the w32tm config on the PDC Emulator.  This will allow us to start afresh and not be concerned with previous potential inaccurate configurations.  This is optional, but something I usually do to ensure that I am aware of every config entry I make.  To do this:

W32tm /unregister

Wait a minute or two

W32tm /register

Now, to configure the PDC Emulator, run the following:

w32tm /configure /manualpeerlist:pool.ntp.org,0×1 /syncfromflags:manual /update

Note: The 0×1 is required as this is a DNS name and not an IP Address.

Syncfromflags:manual tells the server PDC Emulator that it will use an external NTP server for time, and not the domain.

Remember to restart the Windows Time Service after each configuration change.  Use the following commend to restart the Windows Time Service:

Net stop w32time & net start w32time

Once you have done this, you can verify these settings in the Registry in the following location:

HKLM\SYSTEM\CurrentControlSet\Services\W32Time\Parameters
Type:  NTP

NTPServer: pool.ntp.org

You can also use w32tm to check the new configuration:

W32tm /query /configuration

ONLY the PDC Emulator of the Forest Root Domain should have the Type configured as NTP.  All other machines in the domain should have this entry set to NT5DS in order to obtain their time from the Domain and not external NTP servers.

You now need to inform the server to get out there and find what the time is supposed to be using NTP.  Use the following command to do this:

W32tm /resync /rediscover

At any time, you can use the following command to monitor the server which is really great for troubleshooting:

w32tm /monitor

You can also check the status of the server as follows:

W32tm /query /status

The following two registry entries specify the maximum time shift that the DC will accept in seconds from it’s peers:

MaxPosPhaseCorrection (default – 172800 seconds)

MaxNegPhaseCorrection (default – 172800 seconds)

Although Microsoft recommends changing this to 900 seconds, others have commented to reduce this to 300 seconds to ensure you don’t have any 300 second Kerberos issues.  Use your discretion here.  I always use 300 seconds.  The default is 2 days (172800 decimal).  If you are 2 days out, it might be weekend and you are still working…

Note:  If your DC is having difficulty based on any of the above steps, ensure that there are no GPO Time Settings applying to the Domain Controller.  You can find this using Resultant Set of Policy in the following GPO Settings path:

Computer Configuration > Administrative Templates > System > Windows Time Service

Client and additional Domain Controller Configuration

On the assumption that not GPO configuration settings have been applied, the clients should work fine under normal circumstances.

All client devices within the domain should receive their time from the domain.  To manually tell a client to do this, run the following:

w32tm /config /syncfromflags:domhier /update

This can also be done using Group Policy here:

Computer Configuration > Administrative Templates > System > Windows Time Service

Once you have done this, you can verify these settings on the client in the Registry in the following location:

HKLM\SYSTEM\CurrentControlSet\Services\W32Time\Parameters
Type:  NT5DS

NTPServer: PDCEmulatorName

Source: http://robsilver.org/ad/demystifying-time-in-a-forest/

A temporary profile is loaded after you log on to a Windows Vista-based system

After you log on to a Windows Vista-based system, you may notice that a temporary profile has been loaded instead of the profile that corresponds to the current user. Therefore, any changes that you make to the current desktop are lost after you log off the system. Additionally, the notification area may display the following error message:

Your user profile was not loaded correctly! You have been logged on with a temporary profile.

Changes you make to this profile will be lost when you log off. Please see the event log for details or contact your administrator.

 
Finally, the following event is logged in the Application log:Log Name: Application
Source: Microsoft-Windows-User Profiles Service
Date: Date
Event ID: 1511
Task Category: None
Level: Warning
Keywords: Classic
User: User
Computer: Computer
Description:
Windows cannot find the local profile and is logging you on with a temporary profile. Changes you make to this profile will be lost when you log off.

To resolve this problem, follow these steps:

  1. Log on to the system by using an administrative user account other than the user account that is experiencing the problem.
  2. Back up all data in the current user’s profile folder if the profile folder still exists, and then delete the profile folder. By default, the profile resides in the following location:
    %SystemDrive%\Users\UserName
  3. Click Start, type regedit in the Start Search box, and then press ENTER.

    User Account Control permission If you are prompted for an administrator password or for confirmation, type your password, or click Continue.

  4. Locate the following registry subkey:
    HKEY_LOCAL_MACHINE\SOFTWARE\Microsoft\Windows NT\CurrentVersion\ProfileList
  5. Under the ProfileList subkey, delete the subkey that is named SID.bak.Note SID is a placeholder for the security identifier (SID) of the user account that is experiencing the problem. The SID.bak subkey should contain a ProfileImagePath registry entry that points to the original profile folder of the user account that is experiencing the problem.
  6. Exit Registry Editor.
  7. Log off the system.
  8. Log on to the system again.

After you log on to the system, the profile folder is re-created.

Microsoft link: http://support.microsoft.com/kb/947242